
This past long weekend, Brian and I took on a giant project. I don’t think we realized quite how large of a DIY adventure it would be until we started working on it, but by then it was too late to turn back. Don’t get me wrong: the end result was worth it; but with a lot of repetitive activity and tedious motions, this is the kind of project I usually avoid like the plague. Enough whining, though: look at our gorgeous appliqued duvet cover!

Here’s how you can do this for yourself:
YOU WILL NEED:
-a duvet cover. We got ours for $14.00 with pillowcases, at IKEA. Cotton is probably best.
-scraps of fabric: felt, cottons, flannel
-buttons as accents
-Fabric glue: I love Aleene’s
-iron-on adhesive interfacing
-scissors and sewing basics
-parchment paper or cardstock
-large surface to work on
-a co-pilot. This is a two-person job.
WHAT TO DO:
1. Prep your duvet cover by washing and drying it. Don’t use any fabric softener: it will interfere with your adhesives.
2. Choose a design (we got some ideas off the internet), and choose your fabric accordingly.
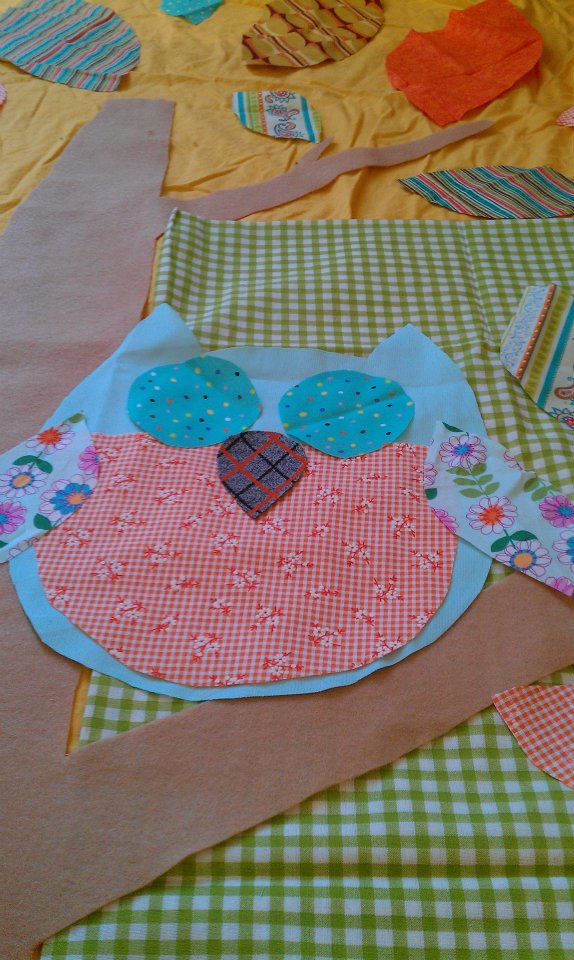
3. Start drawing out your designs onto the fabric and cutting. Practice placing the pieces out.

 |
| Inspiration online. |
Keep cutting.

And cutting.

And placing.
 |
| We lay everything out on a spare yellow sheet while the duvet cover was in the laundry. |
4. Iron all your pieces perfectly. I recommend throwing on a TV show.
5. Lay out your big sheet of interfacing. We got a bulk roll at Fabricland for 16.00. Place your pieces on it. We were careful to squish everything close together, yet we still ran out of interfacing. (This is when the fabric glue steps in.)
6. Iron the interfacing onto the fabric. We couldn’t flip the sheets over without screwing up our placement of the fabric pieces, so we lay file folders (ie cardstock) over the top of everything and just ironed a little longer than directed. Worked great.

7. Cut out all those fabric shapes again. Yyyyyyyep, it’s as much fun as it sounds.

8. Lay out all your pieces on your duvet cover, likely on the floor unless you have the biggest table ever. Follow the directions for ironing your pieces down. Because we had extra leaves, and the branches of the tree didn’t fit onto the interfacing sheets, we used fabric glue for some pieces. In retrospect, I might have used it on everything if I could have guaranteed that I wouldn’t get any ‘wet’ looking spots. The interfacing is stiff and has a ‘crinkly’ quality that is unfortunate, but I think it’ll soften over time.

9. Finishing touches: Brian sewed the owl’s button eyes into place. We’ll have to re-iron a few spots on the tree trunk where the interfacing didn’t quite meld with the duvet cover. But other than that, it’s pretty freakin’ spectacular!


This project took at least 8 hours spread out over 3 days. There were points where we were snapping at each other, where we fought over who lost the scissors, and where my hands were literally coated in fabric glue. We also went over our intended budget: I thought I’d have enough fabric at home to make all the leaves, but it turns out I didn’t have things on theme. Between the plain duvet cover set ($14), the fabric ($40 with lots left over) and the interfacing ($16), we spent $70 on this project. While I recognize that’s not much for a duvet cover, it’s a lot for a craft project that had a high chance of failing.
But, hurray, it didn’t fail. And now we have a personalized, on-theme bedding set that we absolutely adore. And now we just need to go buy the summer-weight duvet to go in it. Yep, we apparently gave away our old one. Sigh. Nothing quite as frustrating as finishing a project and then not being able to use it. ONE SMALL UPDATE: The applique iron-on material turned out to be permanently crinkly, and not the best at adhering. In retrospect, we would have just used the Alene's fabric glue for the whole thing. But if you're doing small pieces instead of, say, a giant tree trunk, the iron-on material may be just fine.
Fair thee warned: sometimes you pay for your project, not with money, but with sweat, tears, and iron burns.
No comments:
Post a Comment